Main mistakes in lighting
Published: 17.09.2021

Light is the key element that is essential for taking a quality photograph. The source of light determines the richness, depth, volume, and overall impression of the photo. Even if you have a professional model, the best clothes, makeup, and expensive equipment, if you set the light incorrectly, the photoshoot will not be successful. Therefore, before taking a photo, think about how suitable the current lighting is, whether to use a flash or additional light sources. There are no strict rules on how to set the light and choose the right lighting, even experienced photographers sometimes make mistakes and have to edit photos in graphic editors. However, there are certain recommendations on when it is best to shoot in certain light conditions and how to adjust the camera settings. Let's consider what mistakes can be made when choosing light and how to avoid them in order to achieve high-quality and clear photographs.
Common mistakes in lighting
Different photographers have their own approaches and preferences when it comes to lighting for shooting. Some prefer to shoot in natural sunlight, while others prefer studio lighting. There are also photographers who specialize in night photography. Whichever lighting option you choose, try to avoid the following mistakes:
- 1. Even if you have found the perfect location but there is not enough lighting, it is not worth choosing that location. It is better to look for a more well-lit place. If it is crucial for you to shoot only at that background, bring additional sources of lighting with you.
- 2. If the eyes in the photo appear dark and lifeless, add some light to them. The human eye instantly reacts to an increase in light. The brighter it is, the more the pupils contract and the more expressive the gaze becomes. If you are shooting in the shade, ask the model to look towards the light and reflections will immediately appear in their eyes. You can also illuminate the face with a white reflector or shoot from a high point so that the model is hit by the diffuse light from the sun's rays.
- 3. When shooting in natural light, spots may appear on the model's face and body. This happens because sunlight falls unevenly on the surface. Shadows can be formed on the photo from window frames or foliage. To avoid them, ask the model to stand with their back to the sun or choose a location where there are no trees, foliage, or other objects that could cast a shadow.
- 4. Do not give up shooting during the day. Any photographer knows that it is best to take photos during the "golden" hours - at sunrise and before sunset, when the sun is not at its peak and the light in the photos is soft and warm. But this does not mean that you should completely avoid shooting at midday. Often interesting events happen suddenly, and you should be ready to capture an interesting shot without waiting for ideal lighting. Try taking photos during the day, take several shots with different lighting directions. Just avoid looking directly at the sun, as the model may squint or close their eyes. Even with harsh lighting, you can still capture successful shots if you choose the composition correctly.
- 5. Make sure that artificial lighting sources do not reflect in mirrors, windows, and polished surfaces. Glare and reflections can be removed by moving the light source, adjusting the framing of the photo, cropping out unnecessary details, or changing the shooting angle.
- 6. If the shadow falls on one part of the face, it may look interesting and artistic, but more often than not it spoils the overall impression of the portrait. This situation can be corrected by moving the light source or using a reflector. The shadow will disappear and the face will be fully illuminated.
- 7. A flash that is too powerful and blinds the eyes can be softened by adjusting the ISO settings to 800-1500. The flash will not work at full power and the model will feel more comfortable during the shoot.
Tips on how to create good lighting for photos
To achieve successful lighting in photos, it is not necessary to spend a lot of money on equipment. Most photos can be taken in natural lighting. If there is not enough light, use a flash and regular household lamps.
Professional softboxes, reflectors, external flashes, of course, will not be superfluous, but their presence does not guarantee perfect lighting in the photo.
Watch out for shadows. Sometimes a sharp or unsuccessful shadow can ruin the overall impression of a photograph. To minimize the shadow, illuminate it with additional light sources or place the subject further away from the background. If none of these options work, remove the excess shadows in a graphics editor.
The more light sources, the better the result. That's why no artificial lighting can replace the sun. But be careful with natural lighting, as overly bright daylight often causes photos to be overexposed. Try to take photos in the morning or evening hours, when the light is more diffused. Also, use diffusers for built-in flash to make the light in the photo softer and more pleasant.
To obtain a clear and deep image, place the light source behind the subject of the shot. This technique is especially helpful when shooting portraits, as the contours of the face become sharper and more defined.
Use light reflectors, they create additional volume in the photo and make the lighting soft and warm.
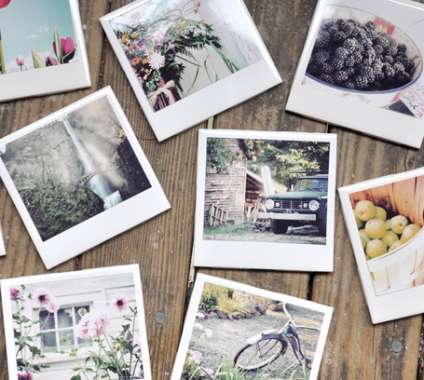
Cool photos deserve a unique framing. Print your cool photos in a Polaroid style. Fans of instant photography from the 90s may experience familiar feelings when holding a Polaroid-style photo in their hands. For those unfamiliar with traditional Polaroid, square images with space for captions will be to their liking.
Experiment with lighting, shoot in red, ultraviolet light, try night photography. Sometimes even when it seems like there is not enough light, you can still get great shots. Try shooting with a long exposure and painting with light, these photos look original and interesting. Look for multiple light sources, capture shadows and silhouettes of people at sunset. With time and experience, you will learn to control lighting, adjust it for different types of shots, and do it intuitively. And the best photos you take, you can keep as memories by printing them in a Light album or ordering a photo book.


