Memorable summer photos
Published: 16.11.2021

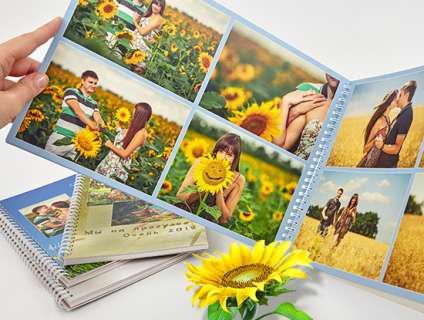
When autumn comes, the last leaves fall from the trees, the weather outside becomes cold and rainy, and you want to add something warm and bright to your life. Pleasant memories lift your mood and can even make the most hardened skeptic smile. When you don't feel like going out in the rainy weather, it's the perfect time to work on your photos. On long and cold evenings, it will be nice to look back at the photos from your summer vacation, remember the warm sunny days, outdoor relaxation, and the sea. Often, vacation photos lie in a folder on the computer or are stored in the phone in their raw and unsorted form for a long time. We suggest working on editing and color correction. The best photos after editing are best preserved by ordering a Light album or a photo book. Let's consider how to best edit summer photos to make them look as presentable as possible.
Techniques for processing summer photos
It's not always possible to take a perfect photo right away. Sometimes there are extra details in the frame that need to be cropped out, or the photo turns out too dark and needs to be brightened. There's nothing wrong with photos not turning out 100% perfect. Most flaws can be corrected and adjusted using graphic editors. Let's consider techniques for color correction in photos that will help enhance your summer photos.
1. Adjust the white balance. Even if you set the white balance on your camera while shooting, the white color may still not be displayed correctly in different lighting conditions. Sometimes areas in the photo that should be white may have a gray or yellow tint. These issues can be corrected in graphic editing programs like Photoshop, Lightroom, ACR. Choose the desired shade in the graphic editor and apply it to all areas of the photo. After editing, the photo will significantly improve, becoming brighter and more contrasted.
2. Calibrate the colors on your monitor. Color reproduction on different devices can vary significantly. When you view a photo on your camera's screen, it may seem like it turned out perfectly. But once you open it on a computer, you may see completely different colors. Calibrate the color reproduction on all your devices, share the photo with friends and ask them to show you how it looks on their screen. If you want to ensure that the colors will be displayed accurately when printing the photo, do a test print. It's better not to take risks and not be disappointed by printed photos looking different from what you expected, so calibrate and adjust all colors in advance.
3. Keep in mind that when printing on different equipment, the color reproduction may vary from the digital version. Make sure that all your images accurately meet the printing requirements. This is especially important for advertising photography, as many companies have specific corporate colors and it is necessary to match the exact shade.
4. Practice color correcting photos in the morning, when your eyes are not tired yet, so you can distinguish shades better. Even if you are a night owl and used to working at night, try to check the colors in the morning. Colors are perceived differently in daylight and at night, so what may have seemed great at night may look dull and faded during the day.
5. Do not be afraid to use filters. Some photographers avoid using filters when processing photos to make them look more natural. Indeed, some filters can ruin a photo, making people's skin look too smooth and unnatural. Use filters in moderation, as when used correctly, they can achieve an interesting and natural effect in the photo. For example, a sepia filter can give your photo an antique look, creating the effect that the photo was taken many years ago and has some historical value.
7. Do not hesitate to ask for advice from specialists. When you look at and edit a photo for a long time, your focus can be lost and it can be difficult to notice small errors. Take a break, go for a walk outside, and then look at the photo again. This way you can notice nuances that you may have missed. Ask for advice in professional groups, on forums for photographers. People who specialize in color correction can give you useful recommendations and suggest what needs to be done to improve the shot. Share several versions of the edited photo and ask others to choose the best one. Two heads are better than one, and the advice of colleagues is always valuable.
Do not be afraid to experiment with photo editing and color correction. Boldly crop the photos, add brightness, contrast, try black and white version. After processing in graphic editors, the photo may look completely different. With color correction, you can highlight the main and secondary details in the picture, focus on a particular object or body part. Before printing photos, make sure to check that all parameters meet the printing requirements, then your photo book or album with summer photos will look cool and make a good impression on those you show them to.
Create a Light album from cool photos. You don't need to print the photos separately. We will print your photos directly on the pages of the Light album. Upload images to the free editor Mapi7 and create a thematic Light album. You can upload photos from your phone.


